Leveling Up Your OSINT Game: Creating a Professional Email on a Budget
Some sites do not allow new users to register with a “free”
email such as gmail.com or outlook.com. This is especially true if a site
offers some free capability, but with the hope of converting you into a paying
customer.
Most OSINT practitioners would prefer to avoid using their “real”
work email to signup for services, so the easiest solution is to register a
domain (if you don’t already have one) and setup an email account using that. In
this blog post we’ll explore how to accomplish this task as easily, and inexpensively
as possible.
Step 1: Acquire The Domain
Many of us have likely purchased a .com or other domain over
the years. Maybe you still have some, or maybe they expired. For years the only
domain registrar I used was Google Domains. It was easy, inexpensive and provided
free private registration to help enhance privacy. Recently, Google decided to
get out of the domain registration business and is in the process of transferring
all registered domains to Squarespace. I’m not a fan of this change at all so
we will not be using Squarespace for the example, we’ll use namecheap.com for
our example here.
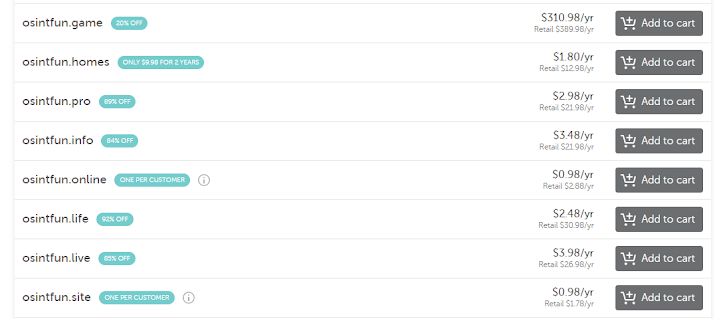
Looking at the namecheap results for “osintfun” domains that
are available, we see that the price for different types of domains vary
greatly, but some are available for under $2 USD per year.
Once you’ve made your purchase, we’ll move on to step 2, but
know that we will be coming back to your domain registrar of choice in just a
minute.
Step 2: Zoho Mail
Zoho Mail is a business email solution that offers numerous plans, including a free plan with a limit of up to 5 users and a 25MB limit on attachments.
You can use Gmail and multiple other options to create a new
account with Zoho Mail and once you’re logged in, select the free plan using
the domain that you just registered.
Once you’ve completed that step, Zoho Mail tells you that
you need to confirm that you own the domain you’ve used. For this step, Zoho Mail
will provide you with a unique TXT record that you need to add to your new
domain’s DNS records.
Step 3: Prove it!
The exact how-to for this step will vary depending on which domain registrar you chose, but all registrars should have detailed instructions on how to make these changes. Once the TXT record is in place, wait a minute or two and go back to Zoho Mail and have them verify that the TXT record is in place. DNS records usually populate within a few minutes so after 15-20 minutes if Zoho is still unable to verify, you may want to doublecheck that the TXT record is entered correctly back on your domain registrar site.
Step 4: Use it!!
Once Zoho Mail has confirmed the DNS entry, you’re ready to
go! I authenticate to Zoho using Gmail, but once logged in I have access to
email for my new domain!
This non free email should be able to be used with services
that require a “real” business account. Congratulations!


Comments
Post a Comment