Nation State Quality OSINT on a Taco Bell Budget – Part 2
Welcome to the second post in our series on getting started using AWS services for OSINT. Last post we covered setting up an AWS account, getting the command line interface installed and configured with your credentials and using the Rekognition service to help solve some very common OSINT problems.
In this post we’re going to build on that and:
- Register as a Twitter developer to get API credentials
- Setup up a Lightsail instance where we can run our code 24/7 for an extremely low cost (free at first)
- Setup an email with Amazon’s Simple Email Service (SES) which we’ll use to send email alerts
- Make a very simple database using Amazon’s DynamoDB
- Tie all of these together to make a persistent twitter monitor in Python
To start off, let’s head over to Twitter and register as a developer so we can get an API key. Twitter does a great job supporting their community and you can sign up for a developer account here: https://developer.twitter.com/en/apply-for-access

The free “sandbox” account is way more than enough for this project and likely any other project you’ll work on in the future. You can see the difference in capabilities here: https://developer.twitter.com/en/pricing/search-fullarchive

Once we’ve started the process of getting our twitter API key, we’re then going to get an email address configured for Amazon’s Simple Email Service or SES.

It’s quick and simple to setup (you just need to verify that an email address is yours) and as you can see in the screenshot below, it’s free for the first 62,000 emails you send every month.
What’s very import to note in the screenshot below is that your newly verified email is in a “sandbox”. This means you can only send emails to other emails you’ve verified, AKA yourself. That’s fine for this project but if you’re going to be using this service in the future, you probably want to apply to be removed from the sandbox so you can send to others.
Applying for sandbox removal is free and fairly straight forward. It includes questions covering things like how you’re going to use the capability and what steps you’re going to take to ensure that only people who wish to receive your emails receive them.


Ok now we’ve applied to be a Twitter developer and verified an email address with SES. Next up is a fun part, AWS Lightsail.
As I mentioned back in the first post in this series, I used to use E3 instances in AWS when I needed to “spin up a box”. Switching to Lightsail has saved me a ton of money. You lose a tiny bit of configuration and networking options, but they’re far from a deal breaker.
As you can see from the screen shot below, when you go to Lightsail and click create instance, your first choice is between Windows or Linux. I’ve used both but for this post, we’re going to use Linux. Your next option is if you want apps + operating system or just an operating system. The apps are things like WordPress and Nginx which we don’t for this series so we’ll choose “OS Only” and then Ubuntu 18.04 LTS.

Once we’ve made that selection we can see that the cheapest option has 512MB of RAM and 20GB of SSD storage. That’s plenty for what we’re doing in this post so we can choose that. The cost is $3.50 a month but the first month is free so you could easily delete the instance within a month to avoid being charged.


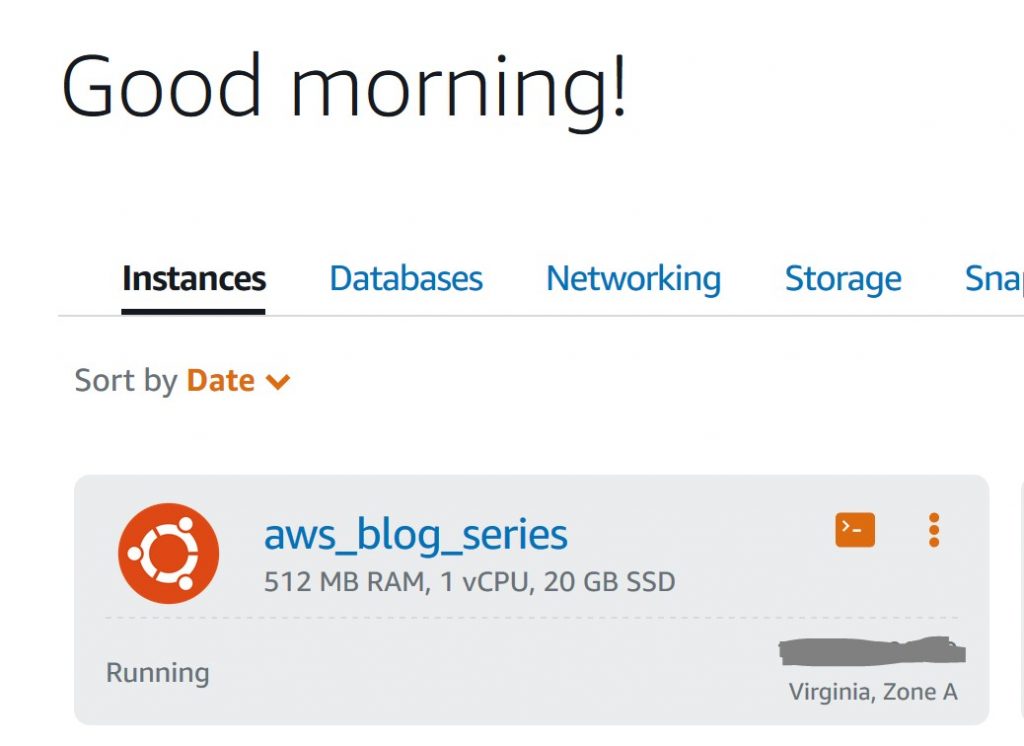
Once we agree, our new instance will take a minute or so to spin up but then we should see a box very similar to this showing us the status of our instance. The icon that looks like a command prompt lets us login to our instance via SSH using a window in our web browser. This is super handy and we’ll do this in just a second. The icon with three dots has several options including stop, reboot, delete and manage. Manage is where you can see (and modify) options like what ports your instance has open and available to the world. By default only ports 22 and 80 were open on this box. Feel free to remove port 80 if you like.
Now let’s click the command prompt icon to log into our box. Once we’re in the terminal for the first time, let’s first run sudo apt-get update and sudo apt-get upgrade to get our box updated.

This will likely take a few minutes. Once that’s finished, let’s run the following commands:
- sudo apt install python3-pip (to install pip so we can install new libraries for python)
- pip3 install requests (adds in the requests library for python so we can write our own “raw” requests instead of using a third party layer to interact with twitter.
- pip3 install boto3 (adds in our aws API like we did in our first post)
- sudo apt install awscli (adds in aws command line interface like we did in our first post)
- aws configure (lets us configure our keys and default region just like we did in our first post)
With these steps completed, we now have a Linux box on the internet 24/7 that we can program for all sorts of monitoring and notification tasks. And it’s only going to cost $3.50 a month. I personally think that’s incredible.
The last piece of infrastructure that we need to set up for this post is DynamoDB. Like most AWS services, DynamoDB has a free tier that’s way more than you’ll need for typical projects. It’s free to 25GB of storage and a LARGE number of transactions each month.
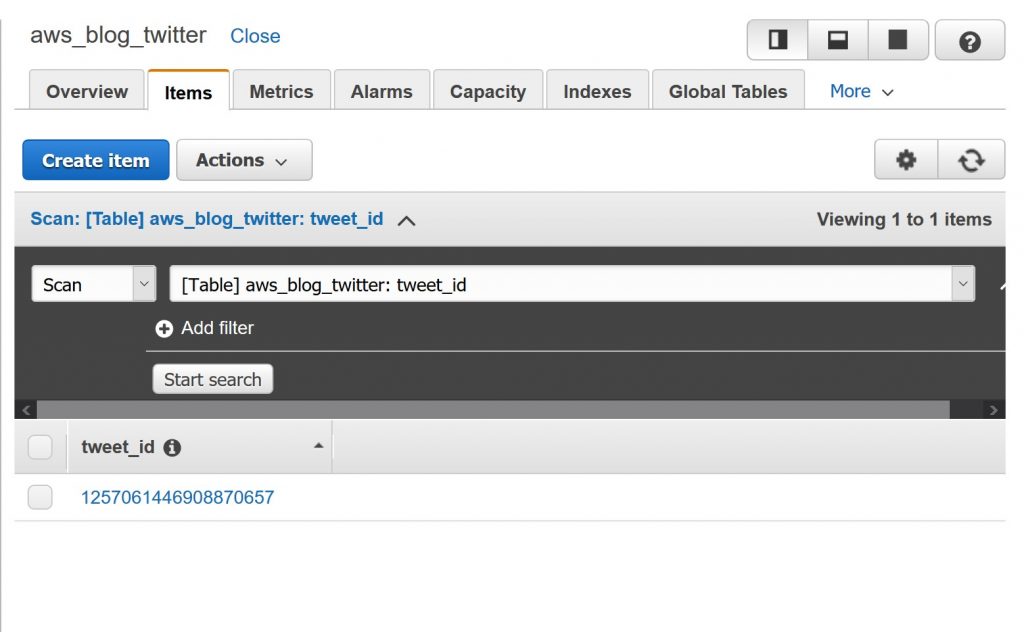
Here we’re going to create a new table named aws_blog_twitter, give it a primary key named tweet_id and change the key type from string to number. All other default settings are fine so once we click create down at the bottom of the screen, we’re good to go.

Now that all of our prerequisites are out of the way, let’s talk about what our python code is going to do. Note: The code for this post is a greatly simplified twitter monitor that I have running 24/7 on a Lightsail box. We’ll improve the functionality of this code in future posts.
- First we’ll import some libraries that we need to function as well as import our twitter API keys and the DynamoDB settings from an external file
- We’ll setup of the Twitter prerequisites that we need to take care of things like authenticating and performing searches
- We’ll make a function to send an email when we need to
- We’ll create a list of queries to search twitter for
- Create our main twitter logic which will:
- Every two minutes search twitter for each of our queries
- If any results are found, check to see if the tweet_id for that tweet is in our database. If it is, pass
- If the tweet_id isn’t in our database, print the tweet and send an alert email
- After the alert email is sent, insert the tweet_id into the database so we don’t alert on that tweet again
I’ve posted the code for this project here: https://github.com/azmatt/awsGettingStarted2ndPost
Once you download the files to your box you’ll need to replace the twitter API keys with your keys in the api_keys.py file and change the email addresses in the twitter_bot.py file. We can then run chmod +x twitter_bot.py to make the file executable.

You can have a whole list of different twitter searches or even use an external file but for this post I only have one query in there: search_queries = [‘breach mega.nz -filter:retweets’]
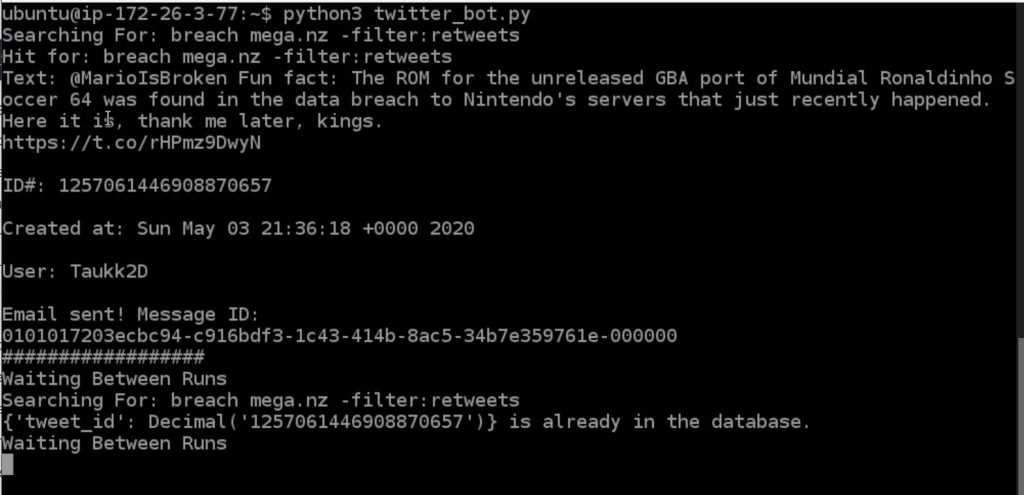
This will show us any original tweet (we’ve filtered out retweets) that contains both the word breach and mega.nz which is a very common site for people to post breach data for others to download. When I ran with python3 twitter_bot.py the code I got one hit:

You can see that it’s now waiting two minutes to search again. If we go look at our DynamoDB table we see the tweet ID for the tweet we just alerted on. Now that it’s in the DB, we won’t alert on it again.

I know that was a lot to cover in a single post but we now have a persistent Twitter monitor that only costs $3.50 a month and is extremely flexible. In our next post we’ll add language awareness to this code and if a tweet isn’t in English, we’ll use Amazon’s translate service to automatically translate it to English. It will be a much shorter post and should be up quickly.

Comments
Post a Comment